hello 大家好我是Monday,今天给大家带来一篇FastAPI中通过SQLAlchemy操作mysql数据库的文章
一、前言
FastAPI中你可以使用任何关系型数据库,可以通过SQLAlchemy将其轻松的适应于任何的数据库,比如:
- PostgreSQL
- MySQL
- SQLite
- Oracle
SQLAlchemy是一个ORM(object-relational mapping)的框架。在ORM中,你创建一个类就会通过SQLAlchemy将其自动转成一张表,在类中的每一个属性就会将其转成表中的字段。
二、项目结构
1
2
3
4
5
6
7
8
| .
└── xxxxx_app
├── __init__.py
├── crud.py
├── database.py
├── main.py
├── models.py
└── schemas.py
|
- init.py 是一个空文件,但是说明xxxx_app是一个package
- database.py 数据库配置相关
- models.py 数据库模型表
- schemas.py 模型验证
- crud.py 数据库操作相关
- main.py 主文件
三、简单实例
1
2
| pip install sqlalchemy
pip install pymysql
|
1、database.py
1
2
3
4
5
6
7
8
9
10
11
12
13
14
15
16
17
18
19
| from sqlalchemy import create_engine
from sqlalchemy.ext.declarative import declarative_base
from sqlalchemy.orm import sessionmaker
SQLALCHEMY_DATABASE_URL = "mysql+pymysql://root:123456@127.0.0.1:3306/test"
engine = create_engine(
SQLALCHEMY_DATABASE_URL, encoding='utf8', echo=True
)
SessionLocal = sessionmaker(autocommit=False, autoflush=False, bind=engine)
Base = declarative_base()
|
在数据库相关的配置文件中,首先创建一个SQLAlchemy的”engine”,然后创建SessionLocal实例进行会话,最后创建模型类的基类。
2、models.py
我们开始创建用户表,字段大致如下,后面做用户token认证时也会用到这张表
1
2
3
4
5
6
7
| {
"username": "johndoe",
"full_name": "John Doe",
"email": "johndoe@example.com",
"hashed_password": "$2b$12$EixZaYVK1fsbw1ZfbX3OXePaWxn96p36WQoeG6Lruj3vjPGga31lW",
"disabled": False
}
|
1
2
3
4
5
6
7
8
9
10
11
12
13
14
15
16
17
|
from sqlalchemy import Boolean, Column, Integer, String, DateTime
from database import Base
import datetime


class User(Base):
    __tablename__ = "users"
    id = Column(Integer, primary_key=True, index=True, comment='自增id')
    user_name = Column(String(32), unique=True, index=True, comment='用户名')
    full_name = Column(String(32), unique=False, index=False, default=None, comment='全称')
    email = Column(String(32), unique=True, index=True, comment='邮箱地址')
    hashed_password = Column(String(64), comment='加密密码')
    disabled = Column(Boolean, default=True, comment='用户状态')
    createtime = Column(DateTime, default=datetime.datetime.now, comment='创建时间')
    updatetime = Column(DateTime, default=datetime.datetime.now, comment='修改时间')
|
通过数据库配置文件中的基类来创建模型类。
3、schemas.py
1
2
3
4
5
6
7
8
9
10
11
12
13
14
15
16
17
18
19
20
21
22
23
24
25
26
27
28
29
30
31
32
33
34
35
36
37
38
39
|
from pydantic import BaseModel
from typing import Optional
class UserBase(BaseModel):
email: str
class UserCreate(UserBase):
"""
请求模型验证:
email:
password:
"""
password: str
user_name: str
full_name: Optional[str] = None
class User(UserBase):
"""
响应模型:
id:
email:
is_active
并且设置orm_mode与之兼容
"""
id: int
disabled: bool
class Config:
orm_mode = True
|
定义请求参数模型验证与响应模型验证的Pydantic模型,其中响应模型中设置orm_mode=True参数,表示与ORM模型兼容,因为后续中返回的数据库查询是orm模型,通过设置这个参数可以将orm模型通过pydantic模型进行验证。
4、crud.py
1
2
3
4
5
6
7
8
9
10
11
12
13
14
15
16
17
18
19
20
21
22
23
24
25
26
27
28
29
|
from sqlalchemy.orm import Session
import models, schemas
from passlib.context import CryptContext
'''
为了数据安全,我们利用PassLib对入库的用户密码进行加密处理,推荐的加密算法是"Bcrypt"
其中,我们主要使用下面方法:
pwd_context.hash(password) # 对密码进行加密
pwd_context.verify(plain_password, hashed_password) 对密码进行校验
'''
pwd_context = CryptContext(schemes=["bcrypt"], deprecated="auto")
def get_user(db: Session, user_id: int):
return db.query(models.User).filter(models.User.id == user_id).first()
def db_create_user(db: Session, user: schemas.UserCreate):
fake_hashed_password = pwd_context.hash(user.password)
db_user = models.User(email=user.email, hashed_password=fake_hashed_password,
user_name=user.user_name, full_name=user.full_name)
db.add(db_user)
db.commit()
db.refresh(db_user)
return db_user
|
通过传入数据库连接以及参数等进行数据库操作,包括创建用户、查询用户等,返回的是orm模型对象。
5、main.py
1
2
3
4
5
6
7
8
9
10
11
12
13
14
15
16
17
18
19
20
21
22
23
24
25
26
27
28
29
30
31
32
33
34
35
36
37
38
39
40
41
42
43
| import sys
sys.path.append("../")
from fastapi import FastAPI, Depends, HTTPException
import crud, schemas
from database import SessionLocal, engine, Base
from sqlalchemy.orm import Session
import uvicorn
Base.metadata.create_all(bind=engine)
app = FastAPI()
def get_db():
"""
每一个请求处理完毕后会关闭当前连接,不同的请求使用不同的连接
:return:
"""
db = SessionLocal()
try:
yield db
finally:
db.close()
@app.post("/users/", response_model=schemas.User)
def create_user(user: schemas.UserCreate, db: Session = Depends(get_db)):
return crud.db_create_user(db=db, user=user)
@app.get("/user/{user_id}", response_model=schemas.User)
def read_user(user_id: int, db: Session = Depends(get_db)):
db_user = crud.get_user(db, user_id=user_id)
if not db_user:
raise HTTPException(status_code=404, detail="User not found")
return db_user
if __name__ == '__main__':
uvicorn.run(app="main:app", host="0.0.0.0", port=8000)
|
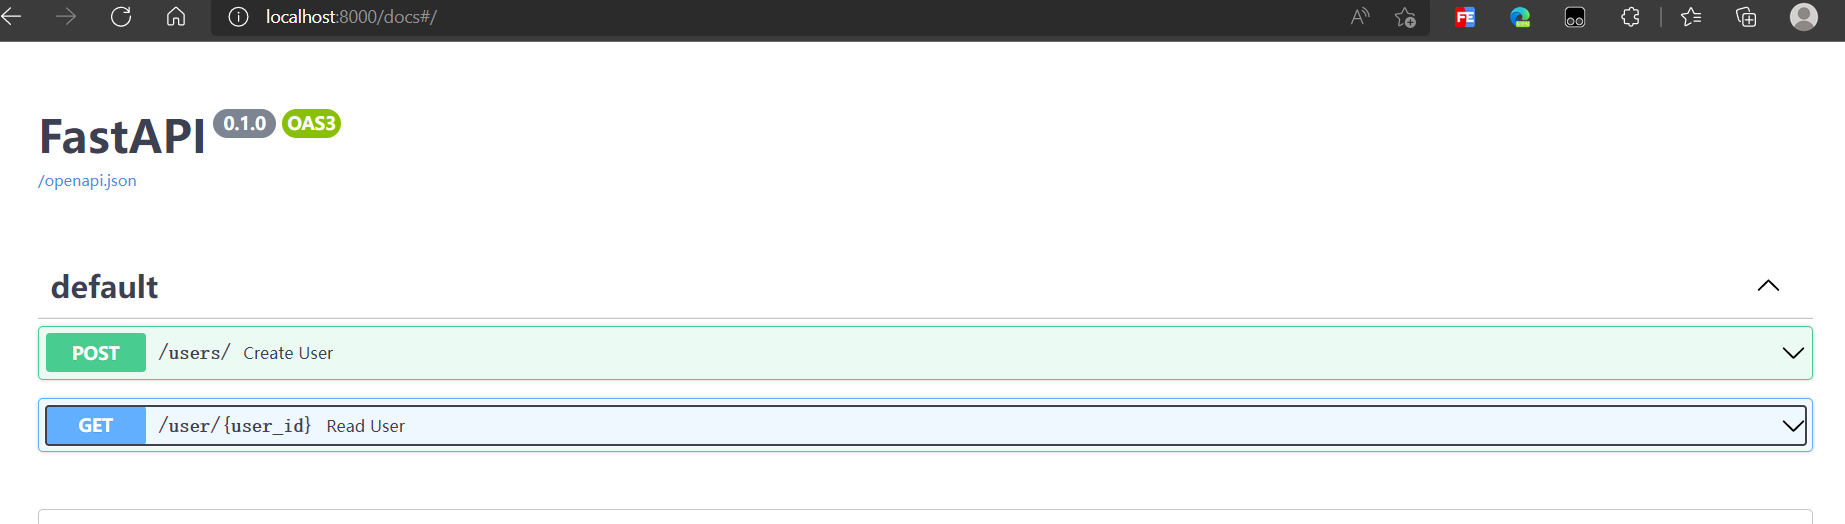
5、测试验证
现在我们查看下文档FastAPI - Swagger UI操作一下
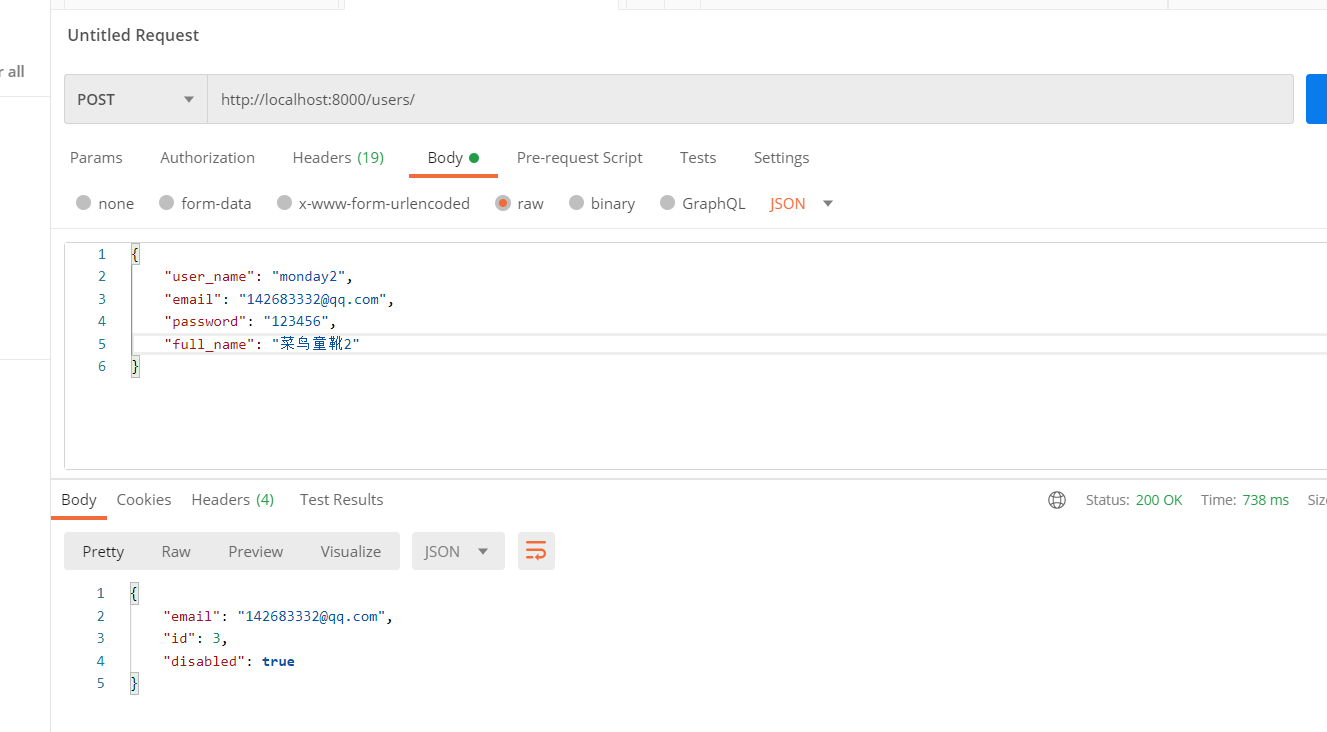
使用postman测试下
python代码
1
2
3
4
5
6
7
8
9
10
11
12
13
14
15
| import requests
headers = {
"accept": "application/json",
"Content-Type": "application/json"
}
url = "http://localhost:8000/users/"
data = {
"user_name": "monday",
"email": "14268333@qq.com",
"password": "123456",
"full_name": "菜鸟童靴"
}
response = requests.post(url, headers=headers, json=data)
print(response.text)
print(response)
|
结果显示:

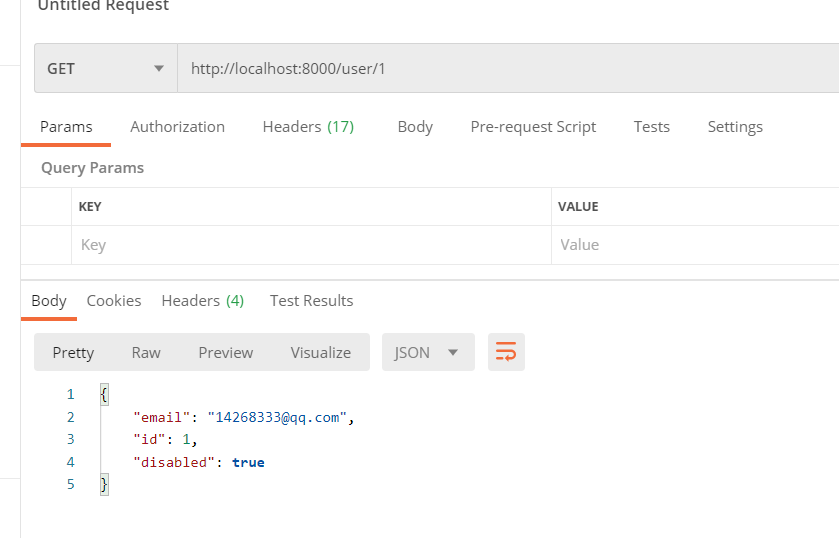
查询用户:
项目完整代码:
BoyYongXin/wx_pub_article_code: 博客发文使用的代码 (github.com)
结束语:
今天的分享就到这里了,欢迎大家关注微信公众号”菜鸟童靴“